LILU LASAN METHI NA THEPLA (GREEN GARLIC AND FENUGREEK SAVOURY FLATBREAD)

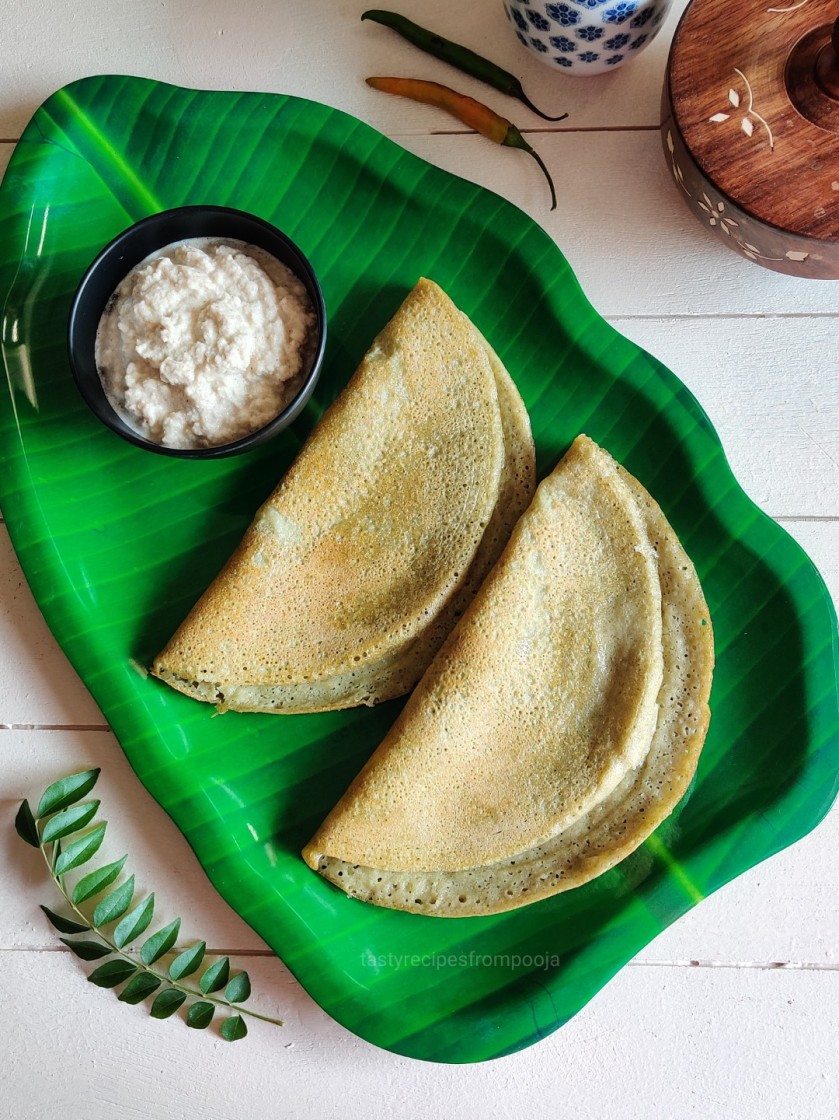
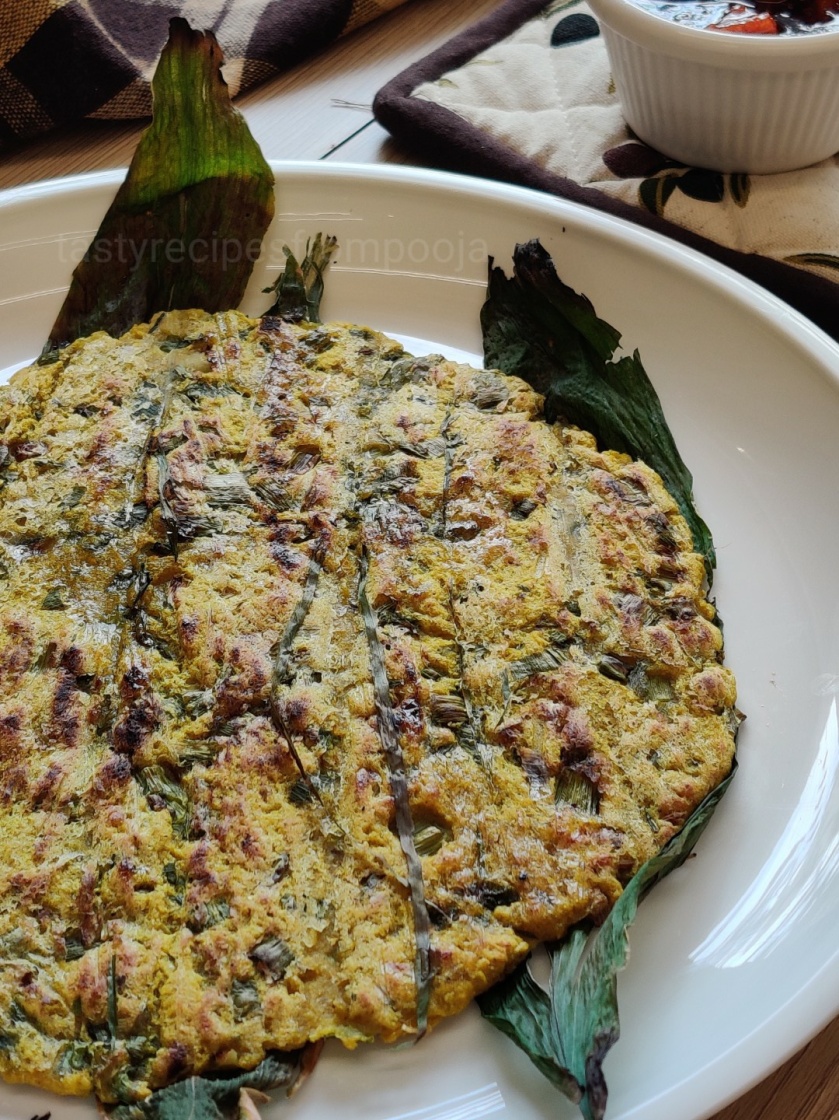
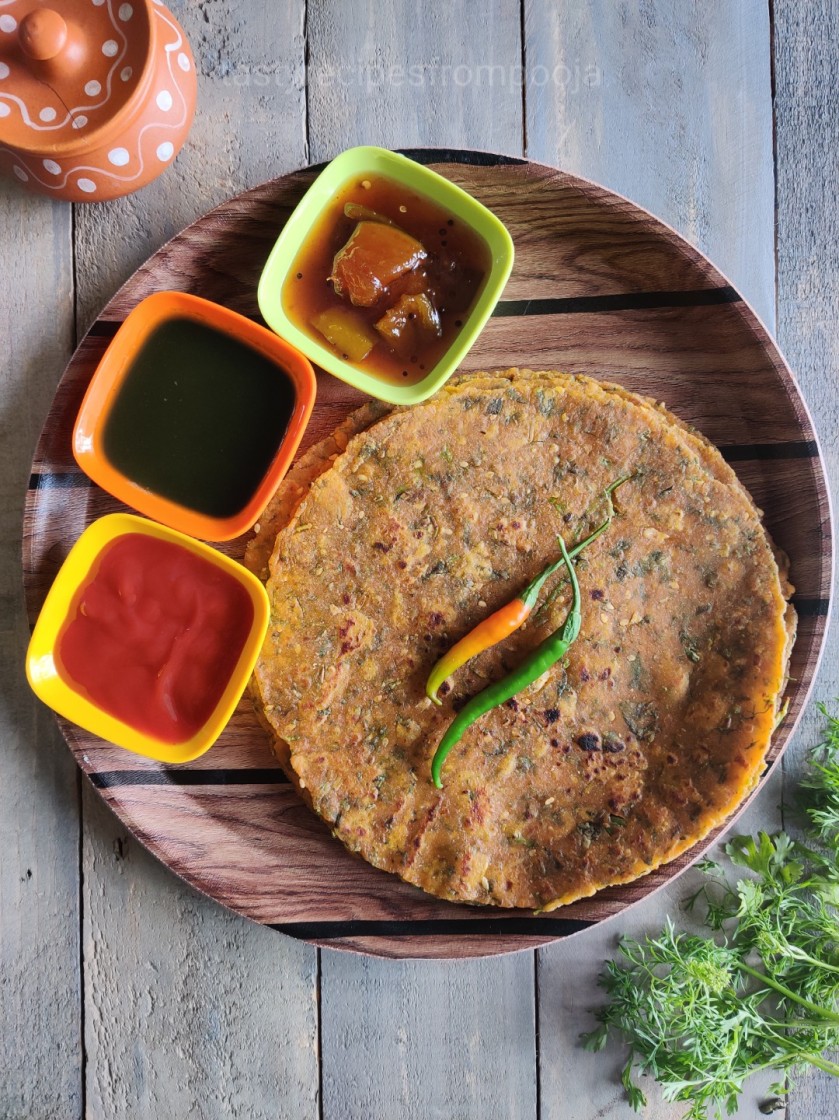
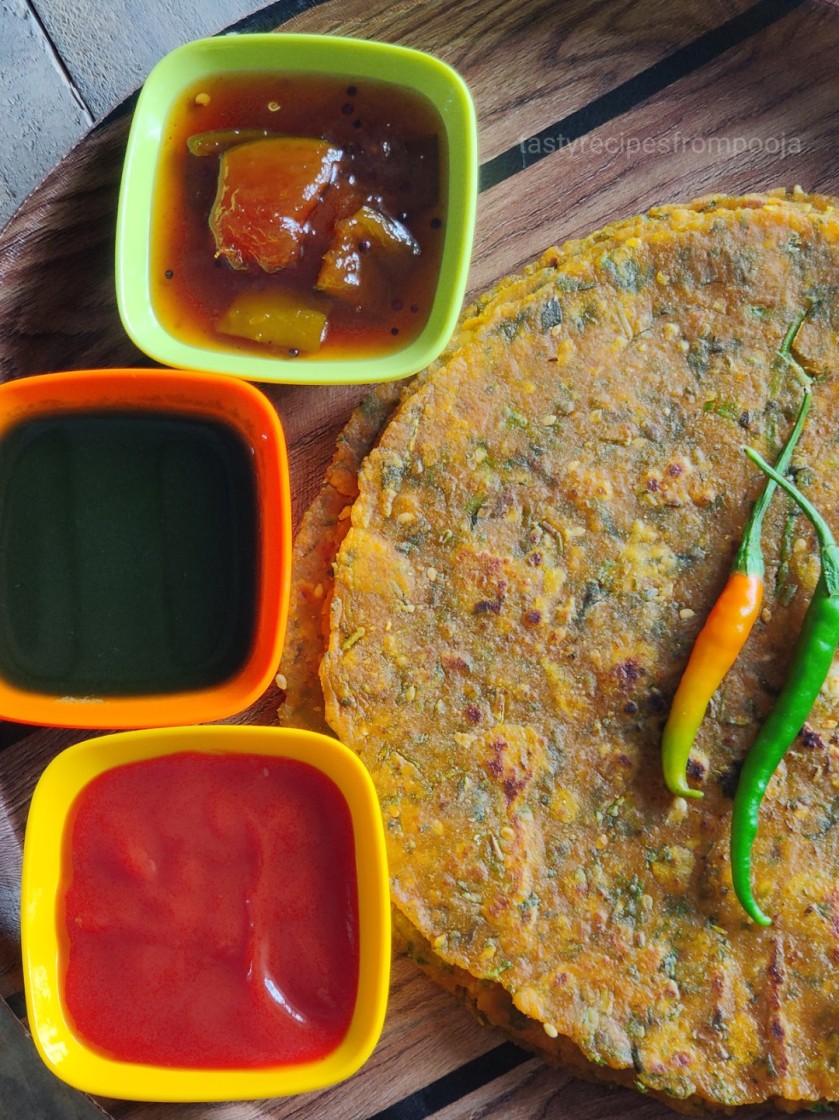
Lilu Lasan Methi Na Thepla is a unique, winter special Gujarati dish with an absolutely delicious flavour. These Theplas are made using the fresh green garlic and fenugreek leaves which are available in abundance in the winters. Winter season is my favourite in general not only due to the pleasant climate we get to experience only then, but also due to the availability of unique fresh green vegetables!

Once again my interest in learning and trying out new traditional dishes lead me to this dish. Got the recipe and also the Theplas for tasting from the same Gujarati friend who taught me the delicious Surti Undhiyu! The combination of fenugreek, garlic and the garlic stalks with curds and jaggery make the theplas taste unique and irresistible!

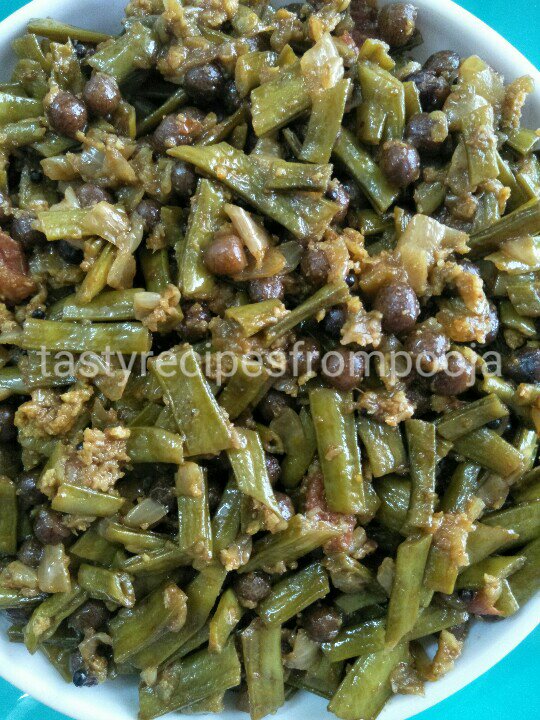
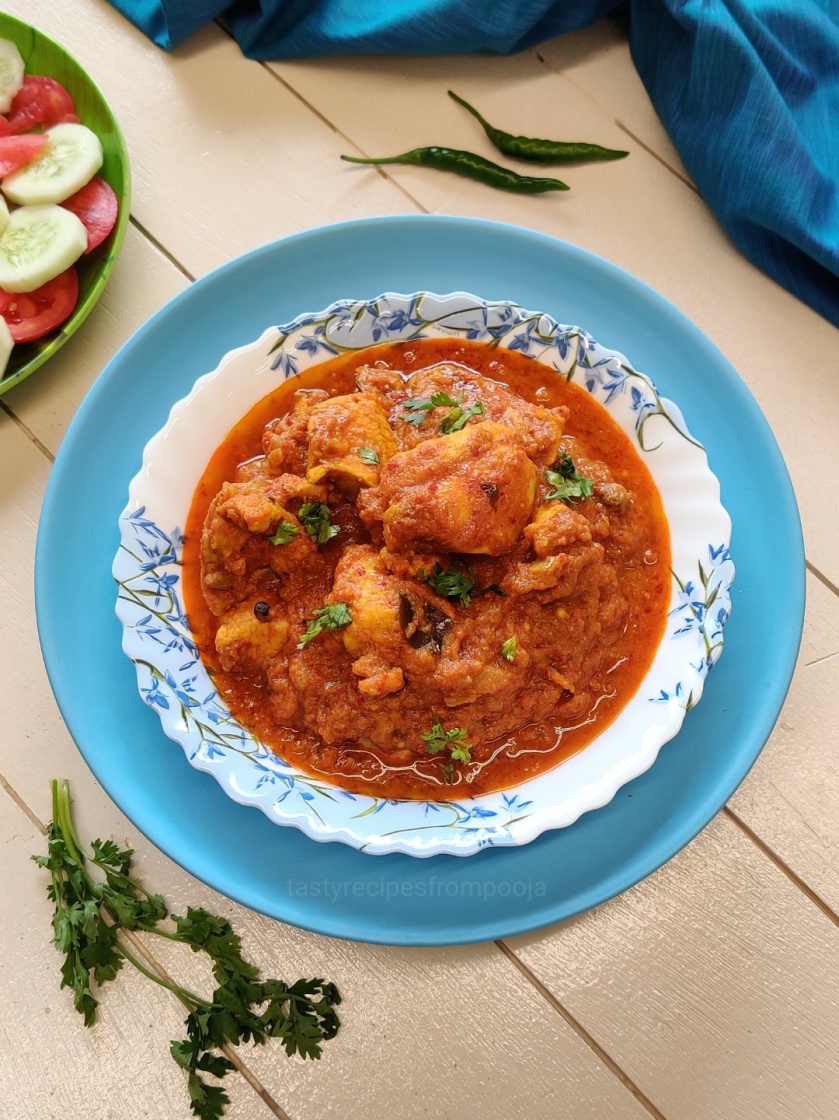
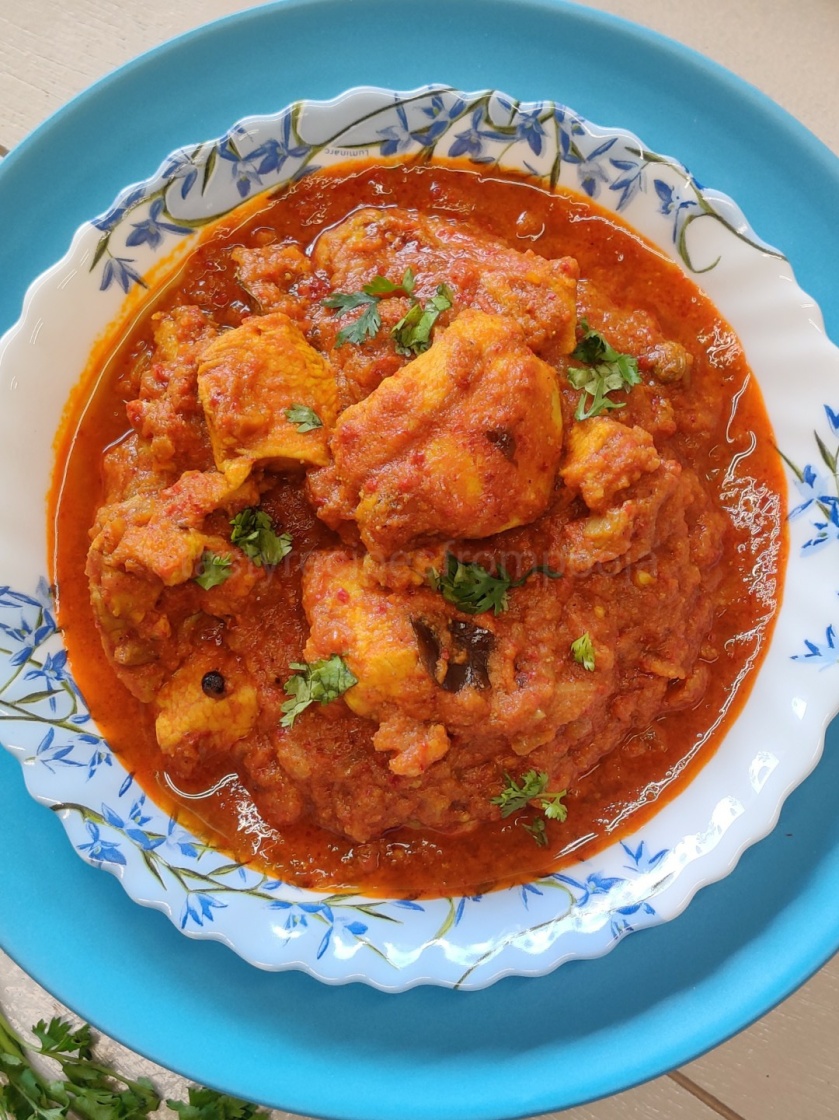
For some more delicious dishes, do take a look at the following recipes too…

  1. Methi Thepla (Fenugreek Flatbread)
  2. Doodhi Thepla
  3. Doodhi Methi Muthiya
  4. Corn Paalak Rawaa Dhokla

Prep Time : 30 min

Cooking Time : 2 min/Thepla

Serves : 14 Theplas

Cup Used : 200 ml

INGREDIENTS :

  • 2 cups Whole Wheat Flour
  • 3 tbs Gram Flour (Besan)
  • 1 cup Chopped Fenugreek Leaves (Methi)
  • 1 cup Finely Chopped Green Garlic Stalks (Obtained from a 100 gm bunch)
  • 4 tbs Sesame Seeds (Til)
  • 1/2 tsp Turmeric Powder
  • 2 tsp Red Chilli Powder…. To be adjusted as per preference
  • 3 tbs Grated Jaggery
  • 1/2 to 3/4 cup Slightly Sour Homemade Curds (Or As Required)
  • 4 tbs Oil
  • Salt To Taste

To Be Ground To A Paste :

  • 1/3 cup Green Garlic Cloves (Obtained from a 100 gm bunch)
  • 20 Large Dry Garlic Cloves
  • 6 Spicy Green Chillies…. To be adjusted as per preference

METHOD :

  1. To make the Lilu Lasan Methi Na Thepla, first discard the roots and thick stalks of the fenugreek leaves, whilst retaining the tender one’s alongwith it’s leaves.
  2. Similarly, discard the roots of the green garlic and separate it’s green stalks
  3. Wash all these veggies separately and drain.
  4. Next, grind together all the garlic cloves and the green chillies and finely chop the methi leaves and the green garlic stalks.
  5. Mix well the grated jaggery with the curds and set aside.
  6. Assemble this curd mixture, chopped greens, garlic chilli paste and all the other above mentioned ingredients in a mixing bowl.
  7. Knead into a semi soft dough and set aside for a while.
  8. For the purpose, it is advisable to use only curds and not water.
  9. Divide the dough into 14 equal parts and roll out into circular discs of approx 7″ diameter each, using whole wheat flour for dusting.
  10. The rolled out theplas should be basically on the thinner side in thickness.
  11. Roast on a hot griddle, fist on a slightly low flame till tiny bubbles appear on the top surface.
  12. Smear some ghee and flip. Roast this flipped side on high flame.
  13. When brown spots appear on the lower side, which indicates that it is cooked, smear some ghee on the top half cooked surface and flip again.
  14. Roast on high flame, applying pressure on the edges with a spatula till the flipped side is roasted.
  15. Transfer onto a plate and smear some more ghee on the top.
  16. Serve these absolutely delicious and nutritious Lilu Lasan Methi Na Thepla with some Kothimbir Pudina Chatni (Corriander Mint Chutney) or Kairiche Aambat Goad Lonche (Sweet And Sour Raw Mango Pickle) and Vadwaani Marchaa Na Athaanu by the side.

NOTE :

The overall taste of these Theplas should be sweet, sour, spicy and a bit garlicky (all the flavours should be on the higher side. In case more spicy taste is preferred, then the quantity of red chilli powder has to be increased.

After winters, when the fresh green garlic becomes unavailable, the quantity of the dry garlic should be increased accordingly.

PESARATTU (ANDHRA STYLE GREEN MOONG DOSA)

Pesarattu is Andhra style Dosa made using Green Whole Moong, a few spices and Raw Rice Grains.

Prep Time : 10 min

Cooking Time : 6-7 min

Serves : 4

Cup Used : 200 ml

INGREDIENTS :

  • 1 cup Whole Green Moong
  • 1/4 cup Red Rice (Or any other Rice variety)
  • 4-5 Fenugreek Seeds (Methi)
  • 2 Green Chillies
  • 1″ Ginger
  • 8 Curry Leaves
  • 1/4 tsp Asafoetida
  • 2 tbs Semolina (Rawaa/Sooji)
  • 1/2 cup Finely Chopped Onions
  • Salt to taste
  • Oil as required
  • Homemade Ghee as required for roasting the pesarattu

METHOD :

  1. For the Pesarattu, rinse and soak the green moong for about 6 hours.
  2. Similarly, rinse and soak the red rice alongwith the fenugreek seeds for the same period.
  3. After the soaking period, drain out all the water and transfer these moong and rice grains to a mixer grinder.
  4. Add the curry leaves, green chillies, ginger and about 3/4 tsp of salt.
  5. Grind using 1/2 cup of water initially. Add some more water, a little at a time and grind again to get a smooth paste.
  6. Approximately 1 cup water is sufficient for this quantity.
  7. Transfer this mixture to a mixing bowl and add the semolina to it. Adding it to the batter aids in getting crisp dosas.
  8. For the pesarattu, heat a cast iron griddle and spread oil on it.
  9. When it heats up, lower the flame and sprinkle some water over it. If it emits a sizzling sound, it means the griddle has cooled just enough.
  10. Spread a ladleful of batter over it in circular motions to get a round disc.
  11. Sprinkle some chopped onions over it and apply slight pressure with a spatula, so that the onions stick to the batter (Adding onions is optional).
  12. When the bottom side is done, flip the pesarattu and roast well on the other side too.
  13. When the flipped side is roasted, flip the pesarattu once again and sprinkle some more chopped onions over it if desired.
  14. Transfer to a serving dish and serve this delicious Pesarattu with some Aalya Chatni (Ginger Chutney) for a healthy breakfast.

GAVAAR KAALE VAATAANYAACHI BHAAJI (CLUSTER BEANS AND BLACK PEAS STIR FRY VEGETABLE)

Gavaar Kaale Vaataanyachi Bhaaji is a Maharashtrian vegetable preparation made using Cluster beans and dry black peas. The combination of this green vegetable and the dry beans gives us a lot of nutrition and tastes delicious too.

Cluster beans fall under the category of green vegetables can be slightly bitter. We generally prefer buying the tender ones as they impart a better taste to the dish. Both the ends of these beans are to be discarded and they need to be threaded before use.

The Gavaar Kaale Vaataanyaachi Bhaaji which I am presenting here is a simple dish, made using very few spices and the jaggery and coconut added to it can be skipped, if they are to be avoided due to medical conditions. And that’s one more reason why tender cluster beans should be preferred as they are comparatively less bitter.

For some more such vegetable preparations, do take a look at the following recipes too….

  1. Kantole Chi Bhaaji (Spiny Gourd Vegetable Preparation)
  2. Papdi Chi Bhaaji
  3. Vaal Padwal Chi Bhaaji
  4. Farasbi Chi Bhaaji
  5. Korala Vaalaachi Bhaaji
  6. Aluchi Paatal Bhaaji
  7. Alucha Phatphata
  8. Tondlichya Kaachryaa

Prep Time : 15 min

Cooking Time : 30 min

Serves : 4

Cup Used : 200 ml

INGREDIENTS :

  • 200 gm Gavaar (Cluster Beans)
  • 1/4 cup Kaale Vaataane (Dry Black Peas)
  • 1 Medium Onion…. Finely Chopped
  • 1/2 Tomato…. Finely Chopped
  • 1/2 tsp Turmeric Powder
  • 1/2 tsp Red Chilli Powder…. To be adjusted as per preference
  • 1/2 tsp Corriander Seeds Powder
  • 1/4 tsp Cumin Seeds Powder
  • 1 tsp Jaggery….. To be adjusted as per preference
  • Salt to taste

For The Tempering :

  • 1 tbs Oil
  • 1/4 tsp Mustard Seeds
  • 1/4 tsp Asafoetida
  • 1 sprig Curry Leaves

METHOD :

  1. To make Gavaar Kaale Vaatanyaachi Bhaaji, soak the dry black peas in sufficient water overnight and rinse them well the next morning.
  2. Drain out all the water and cook the black peas in a pressure pan for about 8-10 whisles on high and further for about 8-10 min on low heat, adding water about a centimetre above the level of the peas.
  3. Sting the cluster beans beforehand and rinse and chop them into approx 1″ pieces.
  4. Next, heat a pan/kadhai and add oil to it. Add the mustard seeds and as soon as they splutter, add in the asafoetida and the curry leaves.
  5. Add the chopped onions and saute till translucent. Add the turmeric powder and mix well.
  6. To this add the chopped cluster beans and 1/4 tsp salt and saute.
  7. Cover and cook stirring occasionally. Add the chopped tomato when the beans are about half cooked.
  8. At the same time, add in the red chilli powder, corriander seeds powder and the cumin seeds powder and mix well.
  9. Cover and cook further on low heat for some more time.
  10. When the beans are almost cooked add in the cooked black peas alongwith the water it was cooked in and mix well.
  11. When the beans are well cooked, add the jaggery, salt to taste and fresh grated coconut and cook uncovered, for a few more minutes till all the water in the vegetable evaporates.
  12. Serve this delicious and nutritious Gavaar Kaale Vaataanyaachi Bhaaji with some soft phulkas or Daal Rice accompanied by some Sukki Lasni Chatni and some Mulyaachi Koshimbir!

CHICKEN CURRY

A variety of chicken curries can be found in India and this one here is just one of them. This chicken curry is a fairly easy one having a no fuss recipe!

I wanted to make a non veg curry with Appams which I have learnt to make in the traditional way from my dear school friend. Well, the recipe of this chicken curry too has been shared by her and was an instant hit with my family! And, let me tell you that it seriously tasted absolutely delicious with those yum appams!

For some more such delicious chicken curries, do take a look at the following recipes too….

  1. Kombdi Vade
  2. Kombdi Sukka Masala
  3. Manglorean Chicken Masala
  4. Methi Murg
  5. Murg Makhani (Butter Chicken)
  6. Chicken Korma
  7. Kombdi Kaleji Sukka Masala
  8. Dhuadaar Murg
  9. Hirvaa Kombdi Masala (Green Chicken Curry)

Prep Time : 30 min

Cooking Time : 40 min

Serves : 4

Cup Used :200 ml

INGREDIENTS :

  • 500 gm Mixed Boneless Chicken
  • 3 Medium Sized Onions
  • 2 Medium Sized Tomatoes
  • 1 tbs Ginger Garlic Paste
  • 1/2 cup Fresh Curds
  • 1 1/2 tbs Corriander Seeds
  • 6-7 Dry Red Bedgi Chillies
  • 1 tsp Turmeric Powder
  • 2 tsp Kashmiri Red Chilli Powder
  • 1 tsp Garam Masala
  • Salt To Taste
  • 1/4 cup Chopped Corriander Leaves for Garnishing

For The Tempering :

  • 2-3 tbs Oil
  • 3 Cloves
  • 1 Black Cardamom
  • 2 Green Cardamoms
  • 4 sticks Cinnamon (1″ each)
  • 4 Black Pepper Corns
  • 2 Bay Leaves
  • 2 Spicy Green Chillies
  • 2 sprig Curry Leaves

METHOD :

  1. To make Chicken Curry, first rinse well and clean the chicken and cut into medium size pieces.
  2. Rub in half the turmeric powder and set aside till further use.
  3. Chop 1 onion finely and puree the other two. Similarly puree the tomatoes and set aside.
  4. In a pan heat the oil and add the above mentioned whole spices.
  5. As they splutter, add the green chillies and curry leaves and stir.
  6. Tip in the chopped onion and saute till translucent.
  7. Add to it the ginger garlic paste and saute. Add in the turmeric powder too and cook further for a while.
  8. Next, add the pureed onions and cook for about 5-7 minutes stirring for a while on high heat and then on low.
  9. Add the tomato puree, kashmiri red chilli powder and saute on high heat for a while.
  10. Cover and cook further for 5-7 minutes.
  11. Pulse the corriander seeds and the dry red chillies in a mixer grinder to get a slightly coarse powder and add it to the curds.
  12. Beat it well and add the mixture to the pan. Stir continuously on high heat till it comes to a boil.
  13. Reduce heat to low and cook covered till the mixture releases some oil and comes well together.
  14. Add in the chicken and saute for a minute or two on high heat. Add water upto the level of the chicken and cook covered.
  15. When the chicken is fully cooked add salt and garam masala. Mix well and cook for a minute.
  16. Garnish with chopped corriander leaves and serve this delicious chicken curry with Appam (Hoppers) or parathas or even rotis!

RAW BANANA AND POTATO CUTLETS

Raw Banana And Potato Cutlets are a good way to incorporate raw banana into our daily diet. The potatoes can be substituted with sweet potatoes to increase the health quotient. Well, raw bananas have their own benefits and apart from making vegetables this is a great way to consume them.

While making Cutlets, we need some binding agen like cornflour or breadcrumbs. Else, the Cutlets do not firm up enough while shallow frying. But the addition of flattened rice does the same trick and the Cutlets turn out firm from within with a lovely crisp exterior inspite of shallow frying and not deep frying them.

For some more such delicious dishes, do take a look at the following recipes too by clicking on the links provided below….

  1. Tiranga Paneer Tikka
  2. Kobiche Bhanole
  3. Aaloo Mutter Paneer Tikki
  4. Healthy Hara Chana Peanut Sesame Balls
  5. Sprouted Ragi And Oats Cutlets
  6. Phodshiche Vade (Cutlets)
  7. Sabudana Wada

Prep Time : 25 min

Cooking Time : 4-5 min/Cutlet

Serves : 12 Cutlets

Cup Used : 200 ml

INGREDIENTS :

  • 1.5 – 2 cups Mashed Boiled Raw Banana (Approx 2 Thick Raw Bananas)
  • 4 Medium Boiled Potatoes…. Mashed
  • 1 cup Thick Flattened Rice (Jade Pohe/Jada Poha)
  • 1 cup Boiled Fresh Green Peas/Frozen Green Peas
  • 4 Spicy Green Chillies
  • 1. 5″ Knob Of Ginger
  • 1 tsp Red Chilli Powder
  • 1.5 tsp Chaat Masala
  • 1 tbs Garam Masala
  • Salt To Taste
  • As Required Oil For Shallow Frying

METHOD :

  1. To make the Raw Banana And Potato Cutlets, first cook the potatoes along with the raw bananas (halved) in a pressure pan for about 4 whistles.
  2. Next, rinse the flattened rice in a sieve and drain out all the water and set aside.
  3. Peel the cooked potatoes and bananas and mash them well or just grate them.
  4. Grind together the green chillies and the ginger and set aside.
  5. Mix together the mashed vegetables, ginger green chilli paste, the soaked and drained flattened rice, green peas, all the above mentioned spice powders and salt to taste.
  6. Mix well and divide into 12 equal parts and mould into round cutlets or any other shape as desired.
  7. Heat oil on a griddle and shallow fry the cutlets on low to medium heat till browned and crisp on both sides.
  8. Serve these delicious Raw Banana And Potato Cutlets with a dip of choice!

NOTE :

If using frozen green peas, there’s no need of boiling them as generally they are very soft. Just a slight crushing by hand is enough.

JWARICHI MASALA BHAAKARI (SAVOURY JOWAR FLATBREAD ROASTED IN TURMERIC LEAVES)

Jwarichi Masala Bhaakari is a nutritious and delicious dish which can be had for breakfast, lunch or even dinner. This is a recipe shared with me by my dear school friend. A unique dish wherein the flatbread/bhaakari is roasted between turmeric leaves, it emanates a wonderful aroma besides absorbing the goodness of the leaves, making it still more healthier!

Originally, they would make it using rice flour and phodshi (monsoon special leafy greens found in the early monsoon weeks only, in the suburbs of Mumbai in Maharashtra), which is the traditional way. But it is my friend who had this brilliant idea of substituting Jowar Flour to increase the health quotient. Again as phodshi is unavailable in the later weeks of monsoon, I added spring onions on her suggestion! Well and this whole combo makes it highly suitable for consumption by diabetics too!!

For some more such delicious traditional dishes, do take a look at the following recipes too….

  1. Phodshiche Thaalipeeth
  2. Taandlaache Thaalipeeth
  3. Doodhiche Dhirde
  4. Mixed Millets Thaalipeeth
  5. Hurdyaacha Thaalipeeth
  6. Mulyaache Thaalipeeth

Here’s the recipe for the nutritious and absolutely delicious Jwarichi Masala Bhaakari….

Prep Time : 30 min

Cooking Time : 10 min/Bhaakari (Approx)

Serves : 2 Bhaakaris

Cup Used :200 ml

INGREDIENTS :

  • 1 cup Jowar Flour
  • 1 cup Water
  • 8-10 Large Garlic Cloves
  • 3 Spicy Green Chillies… To be adjusted as per preference
  • 3/4 tsp Cumin Seeds
  • 3/4 tsp Turmeric Powder
  • 1 tsp Jaggery Powder / Plain Jaggery
  • 1/2 tsp Garam Masala Powder
  • 3 Spring Onion Bulbs…. Finely Chopped
  • 1/2 – 3/4 cup Chopped Spring Onion Greens
  • Salt To Taste
  • As Required Turmeric Leaves

METHOD :

  1. To make the Jwarichi Masala Bhaakari, rinse well and finely chop the spring onion bulbs and it’s greens.
  2. Roughly crush the garlic cloves along with the green chillies and set aside.
  3. Next heat the water and add to it the cumin seeds, the turmeric powder and salt to taste.
  4. When it comes to a rolling boil, add in the jowar flour and mix.
  5. Cover and cook further on low heat for about 2 minutes.
  6. Switch off the heat and set aside covered for about 7-8 minutes.
  7. Next, mix in the garam masala powder, jaggery powder, crushed garlic and green chillies as well as the chopped spring onions and the greens.
  8. Tip the mixture in a bowl and knead well.
  9. Arrange the required turmeric leaves over a flat surface, overlapping each other slightly and taking half the cooked dough, pat it over them to get a circular disc.
  10. Cover it completely with more turmeric leaves.
  11. Heat a griddle and place the bhaakari along with the turmeric leaves on it.
  12. Roast on low medium heat on both sides till the leaves are slightly burnt.
  13. Flip and repeat the process on the other side too.
  14. When done transfer onto a plate and discard the burnt leaves.
  15. Serve this delicious and nutritious Jwarichi Masala Bhaakari with some sweet pickle by the side!

Few pictures depicting the cooking process….

HOT CORN

Hot corn is a popular street food in Mumbai. In addition it is on the list of snacks in movie theatres and malls too!

Sweet Corn or American Corn as it is called too, was introduced in the Indian Market many years back. Till then it is only the regular white corn which was available, that too only in the monsoons.

The sweet corn though is available throughout the year and has led to a creation of many new dishes! One such dish is Hot Corn. A simple recipe, but an absolutely delicious taste makes this dish absolutely Irresistible!

For some more such delicious snacks, do take a look at the following recipes too…

  1. Sweet Potato Corn Chaat
  2. Instant Corn Semolina Paniyaram
  3. Mini Corn Pizza
  4. Chanaa Chaat

Prep Time : 10 min

Cooking Time : N. A.

Serves : 3

Cup Used : 200 ml

INGREDIENTS :

  • 2 1/2 cups Boiled Sweet Corn
  • 1 tbs Butter (Homemade/Store Bought)
  • 3/4 tsp Red Chilli Powder…. To be adjusted as per preference
  • 2 tsp Fresh Lemon Juice…. To be adjusted as per preference
  • 1 – 1 1/2 tsp Chaat Masala

METHOD :

  1. To make this delicious Hot Corn, heat the Boiled corn well and add to it, all the above mentioned ingredients.
  2. Mix well and serve this lipsmaking Hot Corn, whilst still warm!

TANDOORI POMFRET

Tandoori Pomfret is basically a Fried Pomfret dish made using the basic tandoor masala used for chicken tandoori and frying the pomfret enveloped in this delicious aromatic masala! The Indian food scene has evolved immensly over the last few years and this is one dish prominently dominating the menu of restaurants serving sea food!

In India tandoori cooking was traditionally associated with Punjab, as Punjabis embraced the tandoor for making rotis and chicken tandoori.

Currently, Tandoor is one of the most important aspect in the menus in Indian restaurants around the world. Traditionally, the fuel used in the tandoor was coal or firewood which imparted a wonderful aroma and flavour to the food cooked in the tandoor.

But there’s another important aspect to the tandoori cooking, which is the marinade made using hung curd and a few basic spices and some red colour imparted by deghi mirch which is generally used for it’s colour. This exactly is what has been adapted over the years to cook fish with and make it more delicious and appealing to a vast majority of sea food lovers!

For some more such delicious dishes, do take a look at the following recipes too….

  1. Bhajille Nustey
  2. Mori Vade
  3. Cajun Spiced Garlic Butter Prawns
  4. Prawn Cutlets
  5. Crispy Garlic Butter Prawns
  6. Meen Varuthathu (Kerala Style Fish Fry)

Here’s the recipe for the delicious Tandoori Pomfret….

Prep Time : 35 min

Cooking Time : 10 min

Serves : 2

Cup Used :200 ml

INGREDIENTS :

  • 2 Small Pomfrets
  • As Required Oil For Frying The Pomfrets

For The Marinade :

  • 1 tbs Fresh Lemon Juice
  • 1/8 cup Hung Curd (Obtained from 1/4 cup Fresh Homemade Curds)
  • 1 tbs Oil
  • 2 tsp Deghi/Kashmiri Red Chilli Powder
  • 1 tsp Spicy Red Chilli Powder
  • 1 1/2 tsp Corriander Seeds Powder
  • 3/4 tsp Cumin Seeds Powder
  • 1 tsp Chaat Masala
  • 1 tbs Gram Flour (Besan)
  • 2 tsp Ginger Garlic Paste
  • To Taste Salt

METHOD :

  1. To make the Tandoori Pomfret, first clean and rinse well the pomfrets. Using a sharp knife, make diagonal slits on either sides and set aside for all the water to drain out.
  2. First, apply the lemon juice to the pomfrets and set aside for about 10 minutes.
  3. In the meantime, mix together all the other ingredients mentioned under ‘Marinade’, in a bowl.
  4. Rub it in the slits made on the either sides of the fish and apply well over the pomfrets.
  5. Set aside approximately for an hour for the flavours to seep in well.
  6. Next, heat a griddle and add oil to it. Release the marinated pomfrets in it and fry well on both sides on low to medium heat till a bit charred.
  7. Serve this lipsmakingly delicious Tandoori Pomfret with some crunchy onion salad and a wedge of lime for that added zing!

METHI DAAL (LENTILS COOKED WITH FRESH FENUGREEK)

Methi Daal, i.e. lentils cooked with fresh fenugreek leaves and seasoned with a simple tempering using minimum spices, is an absolutely delicious lentil preparation which goes extremely well with just some piping hot steamed rice or say even with roti or naan!

Fenugreek which is high on the nutrition quo when combined with all the more healthy, daal/lentils obviously creates an extremely nutritious dish! Using literally, the barest of spices in the preparation enhances the flavour of the fenugreek/methi in the daal as well as it’s aroma, taking this simple dish altogether to another level!

For some more such delicious daals, do take a look at the following recipes too…..

  1. Nutri Daal Fry
  2. Udupi Sambar
  3. Daali Toay
  4. Daal Tadka
  5. Varan
  6. Daalichi Aamti
  7. Daal Fry
  8. Moong Daal Fry

Here’s the recipe for the delicious Methi Daal….

Prep Time : 25 min

Cooking Time : 15 min

Serves : 4

Cup Used :200 ml

INGREDIENTS :

  • 1/2 cup Skinless Split Pigeon Peas (Toor/Arhar Daal)
  • 2 cups Fresh Fenugreek Leaves (Alongwith it’s tender stems)
  • 8 Small Garlic Cloves
  • 1/2 cup Finely Chopped Onions (1 Medium Sized Onion)
  • 1/2 cup Finely Chopped Tomatoes (1 Medium Sized Tomato)
  • 1/2 tsp Turmeric Powder
  • 1/2 tsp Spicy Red Chilli Powder…. To Be Adjusted As Per Preference
  • 1/2 tsp Kashmiri Red Chilli Powder…. Optional
  • Salt To Taste
  • 2 tbs Oil (For Tempering)

METHOD :

  1. To make Methi Daal, soak the skinless split pigeon peas in sufficient water for about an hour.
  2. Next, after the stipulated time rinse it well thrice and drain.
  3. Add the turmeric powder and water upto the level of the daal and set aside.
  4. Rinse well the fenugreek and chop finely. Add it to the daal and pressure cook for about 8-9 whistles on high heat.
  5. Open the lid only after the pressure releases naturally and slightly mash the daal with a ladle.
  6. In a pan, add the oil for tempering. As it heats up, add the crushed garlic and saute for about a minute.
  7. Add in the chopped onions and saute till translucent.
  8. Next, add the red chilli powders and chopped tomatoes and saute till they soften.
  9. To this, add the mashed daal and water as required to get a medium thick consistency.
  10. Add salt to taste and heat it till it reaches a boil.
  11. Switch off the flame and set aside for a while to allow all the flavours to assimilate well.
  12. Serve this delicious methi daal with some piping hot steamed rice or even some tandoori roti or Garlic Butter Naan!

INDIAN STYLE CRISPY FRIED CHICKEN

Crispy Fried Chicken is a general favourite amongst many. We normally come across many such recipes wherein the chicken is dipped in seasoned flour and breadcrumbs and deep fried till crisp.

But the one I have presented here, is totally Indian in the sense that it is cooked exclusively in Indian spices and coated with our very own, regularly used rice flour and semolina!

Using mixed boneless chicken for this dish, gives absolutely succulent, flavourful pieces with a crisp exterior! Though using chicken with bone depends solely on one’s personal choice or say preference. And to say, this doesn’t diminish either it’s deliciousness or crispness in any way!

Many years back, it was my mom who would make this dish with the extra chicken chunks (with bone), which weren’t required for the curry as the family then was small and a kilo was more than enough!

For some more such delicious non vegetarian starter dishes, do take a look at the following recipes too….

  1. Chicken Crispy With Mushrooms
  2. Chicken Tandoori Tavaa Fry
  3. Chicken Bhujing
  4. Mutton Chops
  5. Crispy Garlic Butter Prawns
  6. Cajun Spiced Garlic Butter Prawns
  7. Prawn Cutlets

Here’s the recipe for the lipsmackingly delicious ‘Indian Style Crispy Fried Chicken’…

Prep Time :

Cooking Time : 4-5 min/Batch

Serves : 4-5 (20 medium sized chunks approx)

INGREDIENTS :

  • 1 Kg Boneless Chicken (Preferably Mixed Boneless)
  • As Required Chaat Masala
  • As Required Oil For Frying

For The Marinade :

  • 2 tbs Lemon Juice
  • 2 tbs Hung Curd
  • 1 tsp Turmeric Powder
  • 2 tsp Kashmiri Red Chilli Powder
  • 2 tsp Spicy Red Chilli Powder…. To be adjusted as per preference
  • 2 tsp Corriander Seeds Powder
  • 1/2 tsp Cumin Seeds Powder
  • 1 tsp Punjabi Garam Masala *
  • 1 1/2 tbs Ginger Garlic Paste
  • Salt To Taste

For The Coating :

  • 1 cup Rice Flour
  • 3-4 tbs Semolina

METHOD :

  1. To make Indian Style Crispy Fried Chicken, first thoroughly rinse the boneless chicken in clean water and set aside to drain.
  2. Next, chop it into chunks of desired size and rub in the lemon juice and the ginger garlic paste well into them.
  3. Mix together the rest of the ingredients mentioned under ‘Marnade’ and coat the chicken chunks well with this mix.
  4. Set aside for about an hour or more.
  5. Heat a pan and add oil to it for frying.
  6. In the meantime, mix together the rice flour and the semolina and coat the chicken chunks well with it.
  7. Release these chunks in hot oil in batches and fry on low medium heat, adjusting the temperature of the oil as required during the process.
  8. When the chunks appear crisp on both sides and are well cooked, drain them onto an absorbent paper.
  9. Serve these delicious crispy fried chicken chunks in pure Indian style, with a light sprinkle of chaat masala, accompanied by a a cooling yoghurt mint chutney and some crisp salad by the side!

NOTE :

For the Punjabi Garam Masala, just lightly roast equal quantities of green cardamoms, cloves, cinnamon and black pepper corns and grind into a fine powder when cooled.